
How to easily improve small object photo exposures when using a smartphone camera
A super simple, low-tech solution to eliminating under-exposed shots against white backgrounds
Things you’ll need:
• A table or other flat surface.
• Lamps with daylight (5000 kelvin) bulbs.
• Smartphone camera.
• A Sweep of some sort. I use an opaque windowshade, but a piece of white paper will do.
• The small object to be photographed.
• Two black cards.
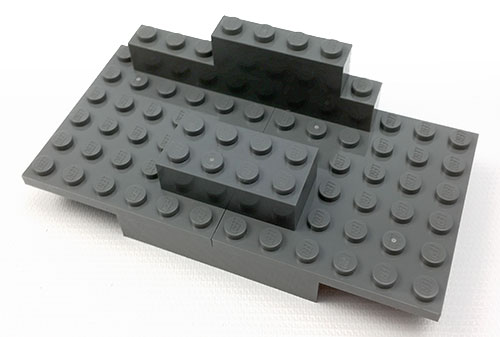
• Two blocks to be used as props for the cards.
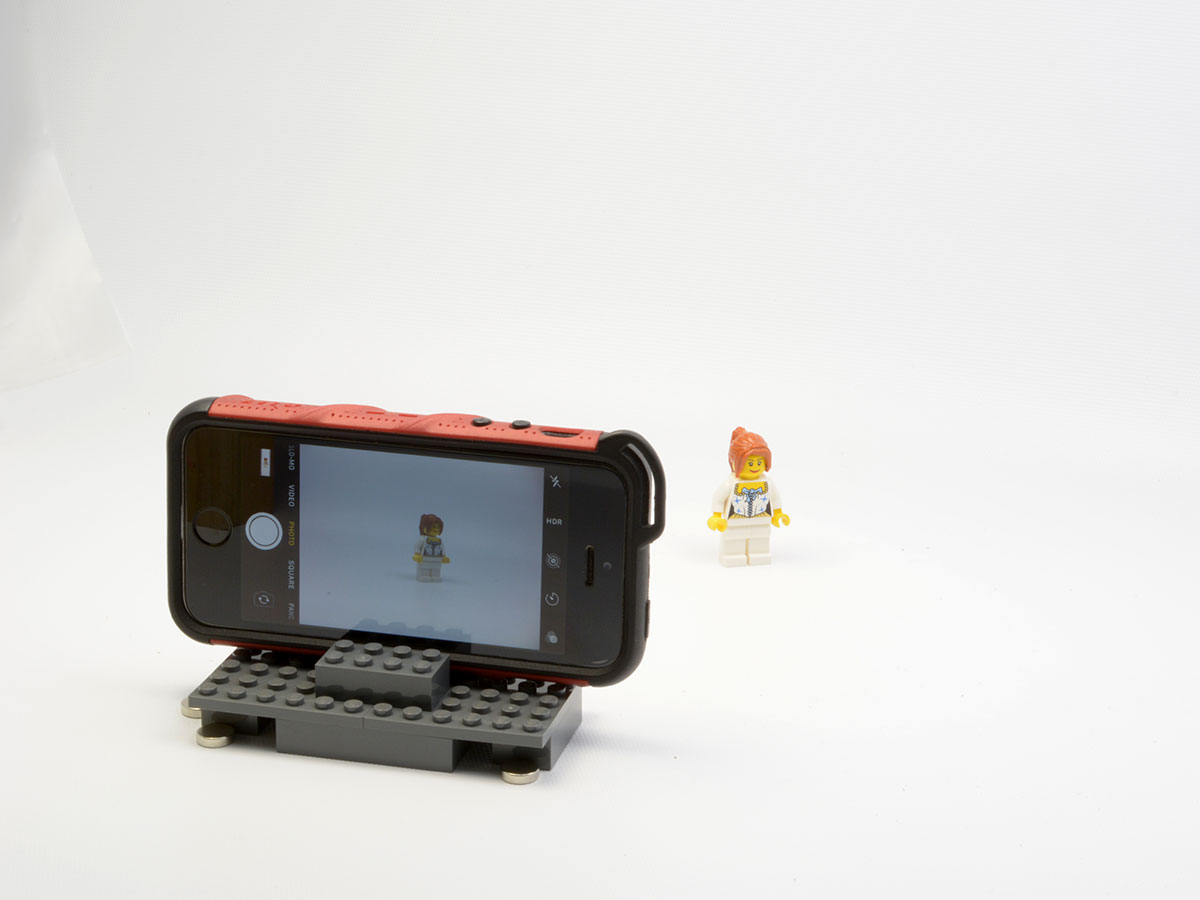
• Optional: I made a caddy for the smartphone. This will make the process a whole lot easier when you come to positioning the cards.
Above, the phone caddy I made from Lego® bricks.
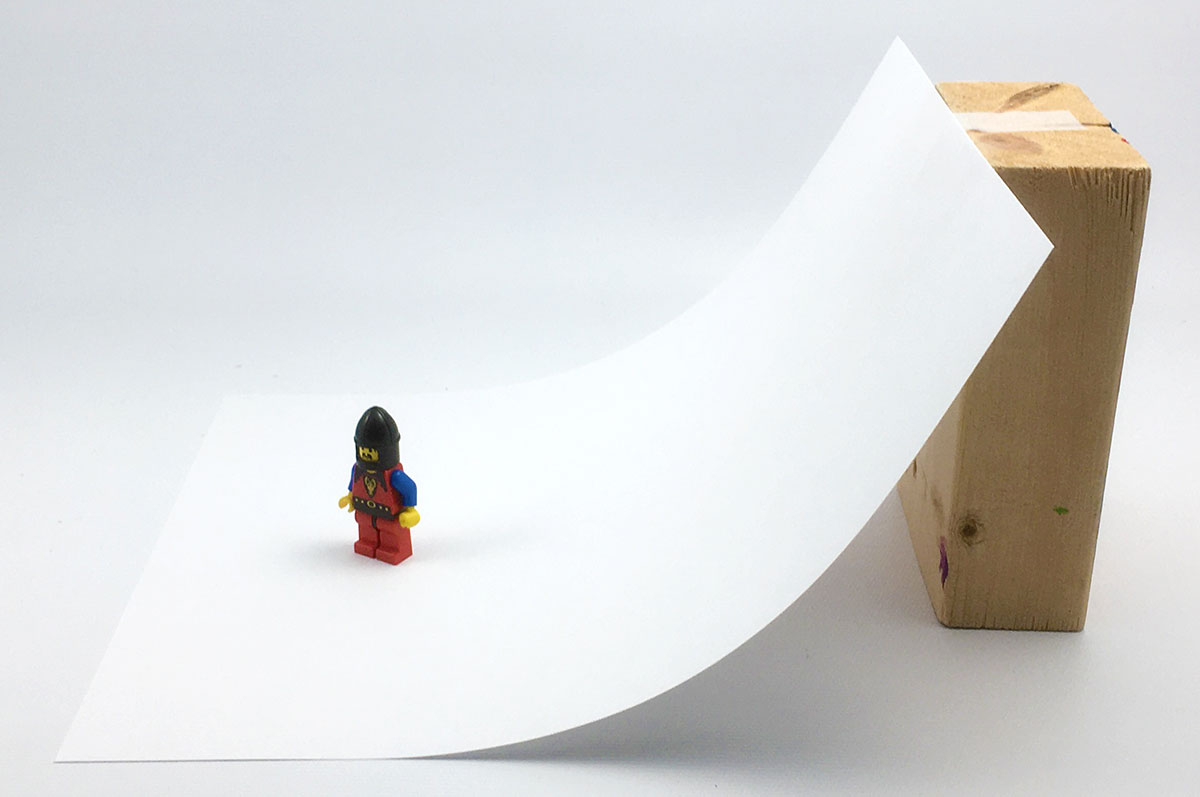
Above, a simple sweep can be made by simply taping a piece of paper to a block.
Set up your workspace.
Hang or otherwise attach your sweep towards the back of your table. This is to provide a seamless "white" background. Place the object reasonably far back on the sweep, but not so far that it rests on the curl of the sweep.
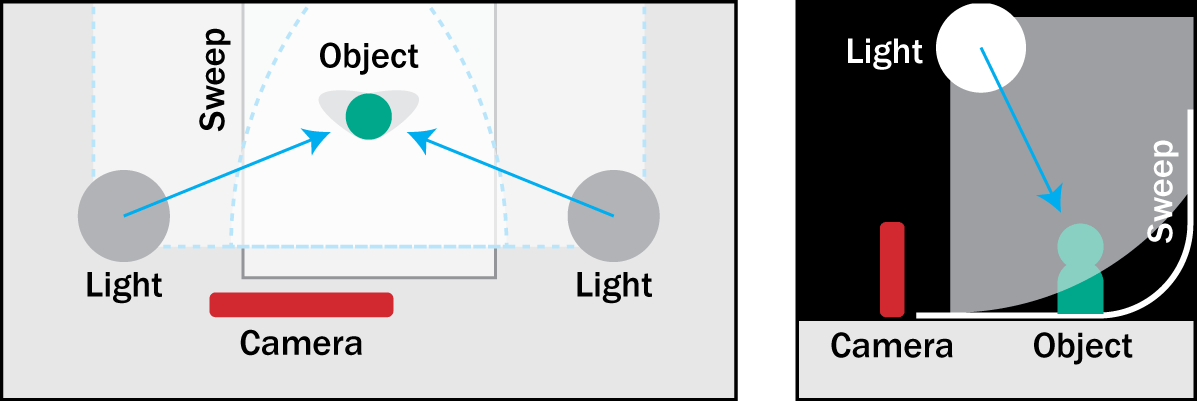
Position your lights between the camera and the object. Positioning them in this way is fairly critical. Lights should be above the object and the camera and at about 45 degrees above the object. Because the object to be photographed is small and the phone cam has a very wide angle lens, the phone will need to be fairly close to the object. Getting the lights positioned between the camera and the object can be a little tricky. Make sure the lights are NOT positioned behind the object or directly to the sides of the object. You need to have light falling on the face of the object and not have the object either back-lit or side-lit.
The camera doesn’t need to be so close to the object that it fills the frame. It is actually better to back the camera off somewhat to reduce distortion.
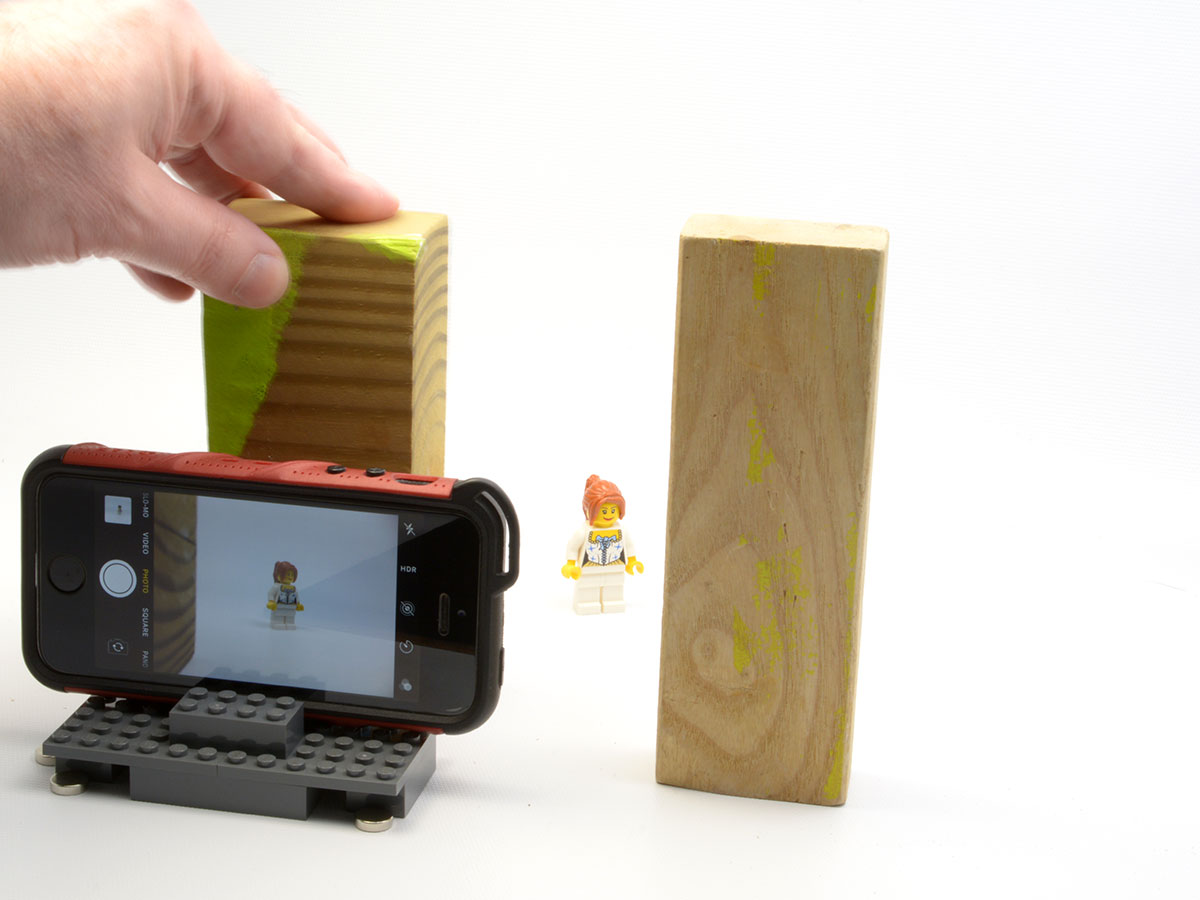
Set the two prop blocks, one on either side of the camera lens.
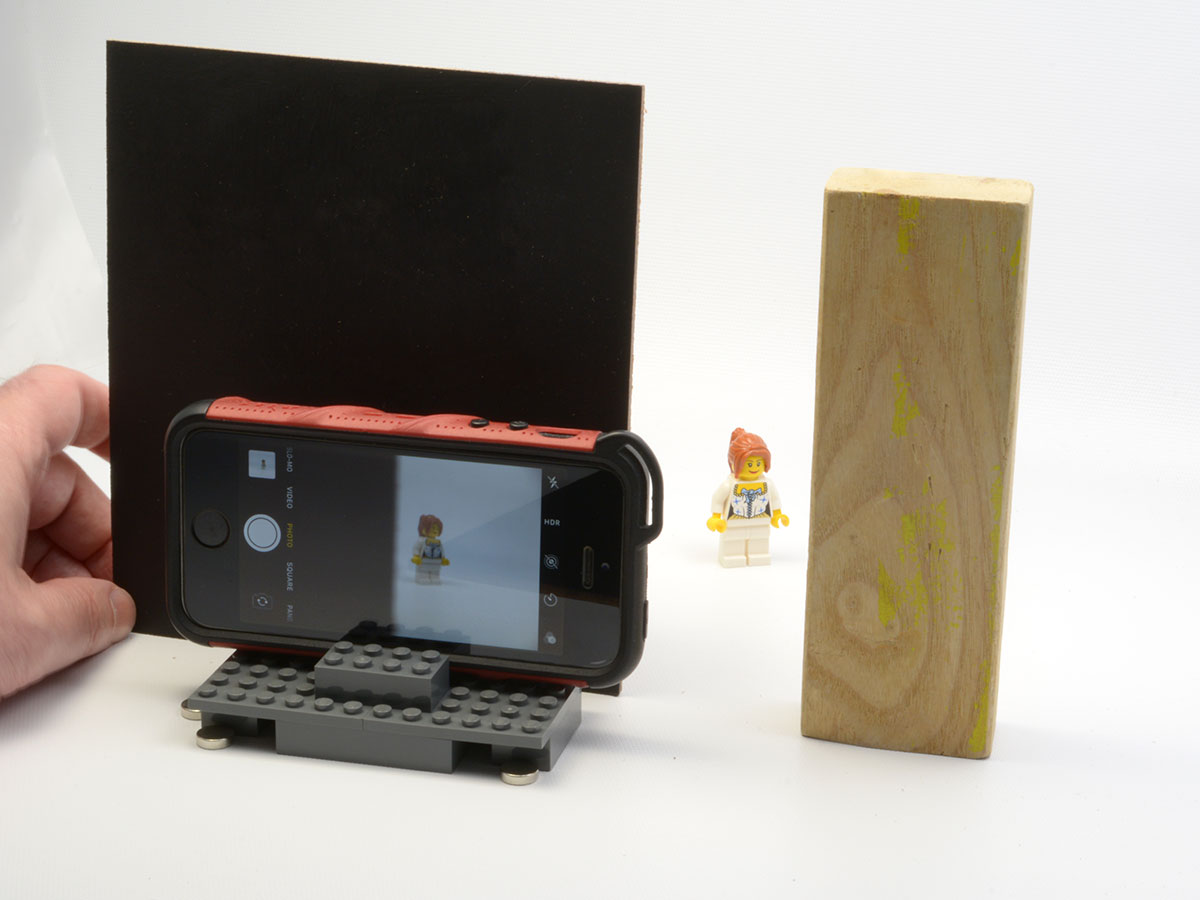
Place the black cards against the prop blocks. Pay attention to the viewfinder on the camera. Position the cards close to, but not super tight to the object to be photographed. The idea here is to block out much of the white background.
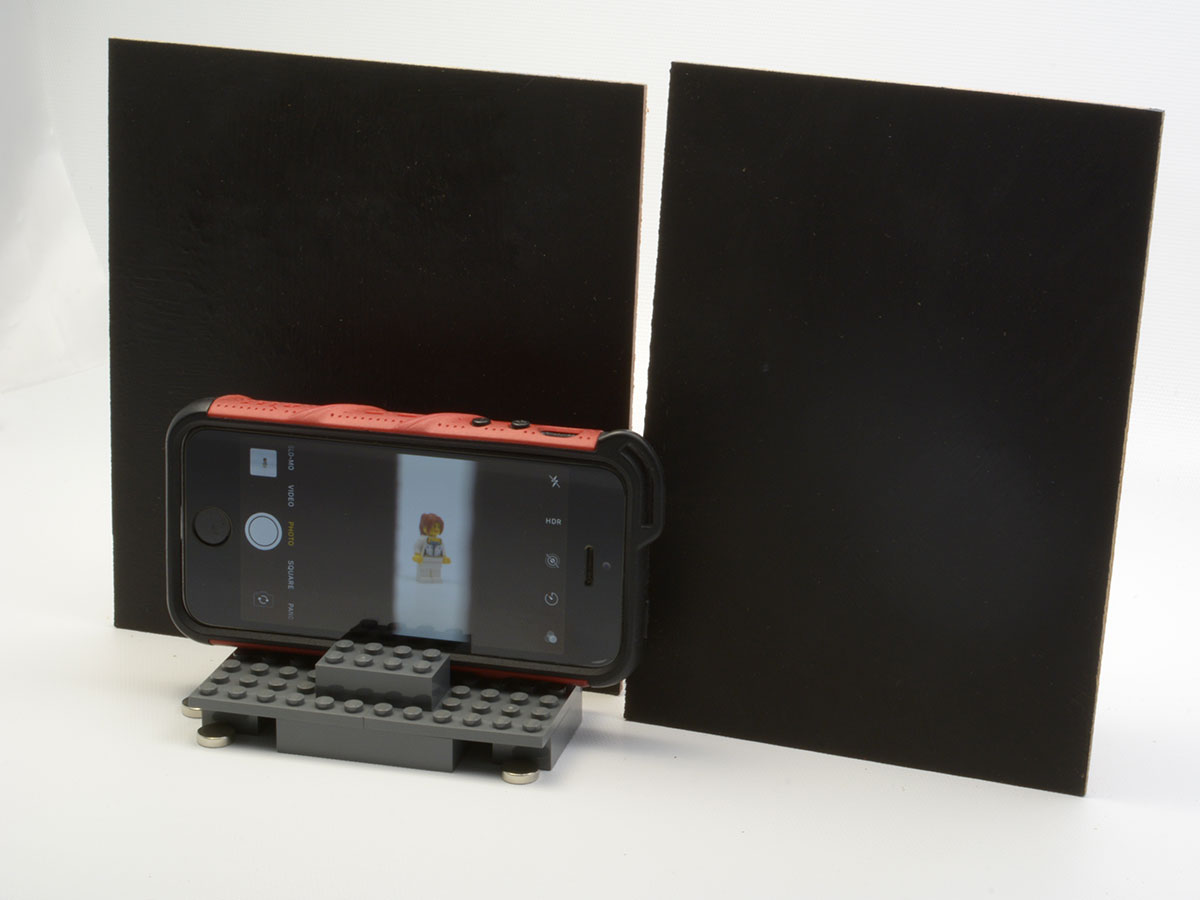
The cards will end up being positioned fairly close to one another, leaving a very narrow slit for the lens to peer through.
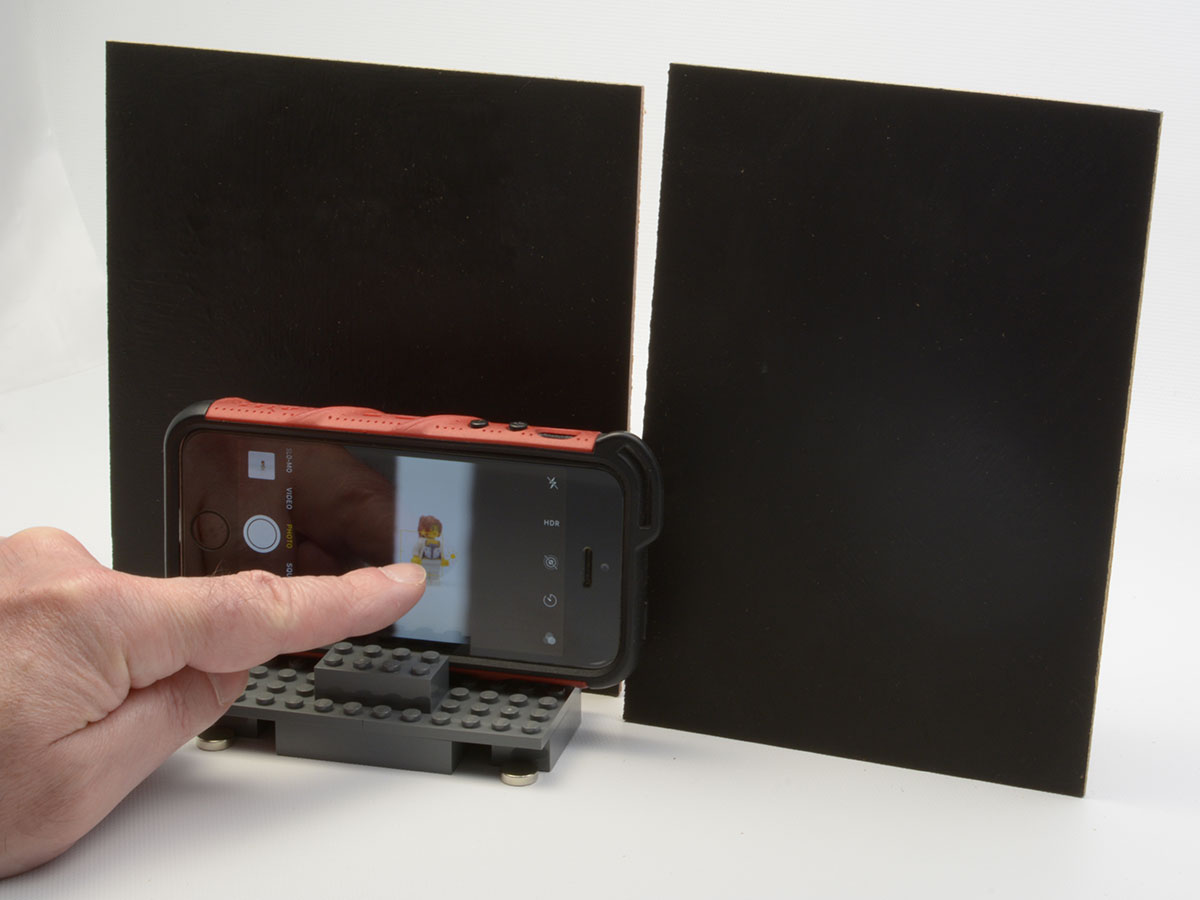
Tap the screen of the phone to set the focus on the object. If you don’t do this, the camera will have trouble deciding what the focal point is because the cards are so close to the lens. So tap the object, make sure the object becomes in focus and quickly check that the blur from the now out-of-focus cards is not interfering or partially covering any edge of your object to be photographed. If you do have blur overlapping the object, then reposition the card and tap to set focus again. If all is well, tap the button to take the photo.
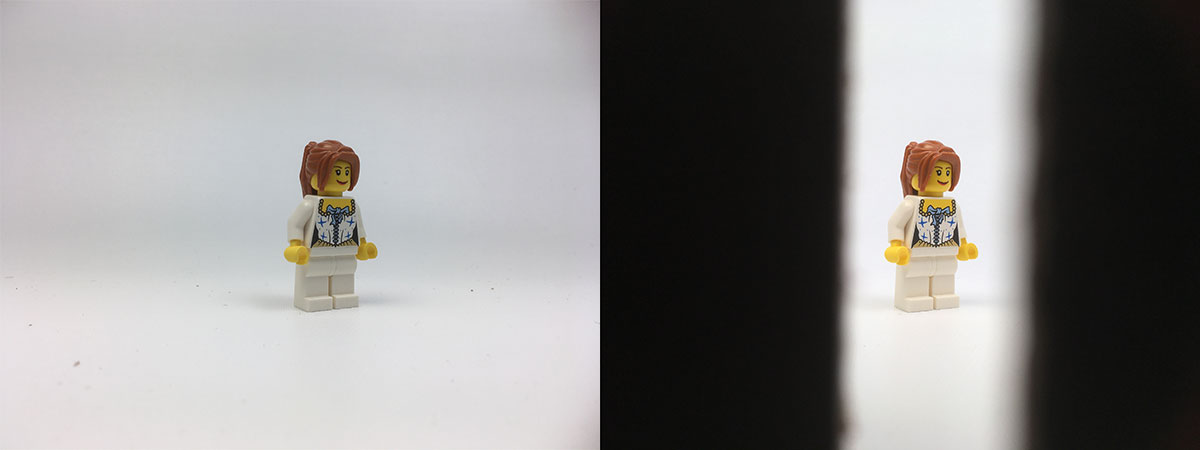
Above is a side-by-side comparison of the same object with identical positioning of all elements with the exception of the black cards. On the left is the object without using the black cards. On the right is the object using the black cards. Note the object on the left is overall more gray. On the right the background is whiter and the colors pop well in comparison. These shots are directly off the phone cam and are not manipulated in any way other than to resize to fit the space here on the web page.
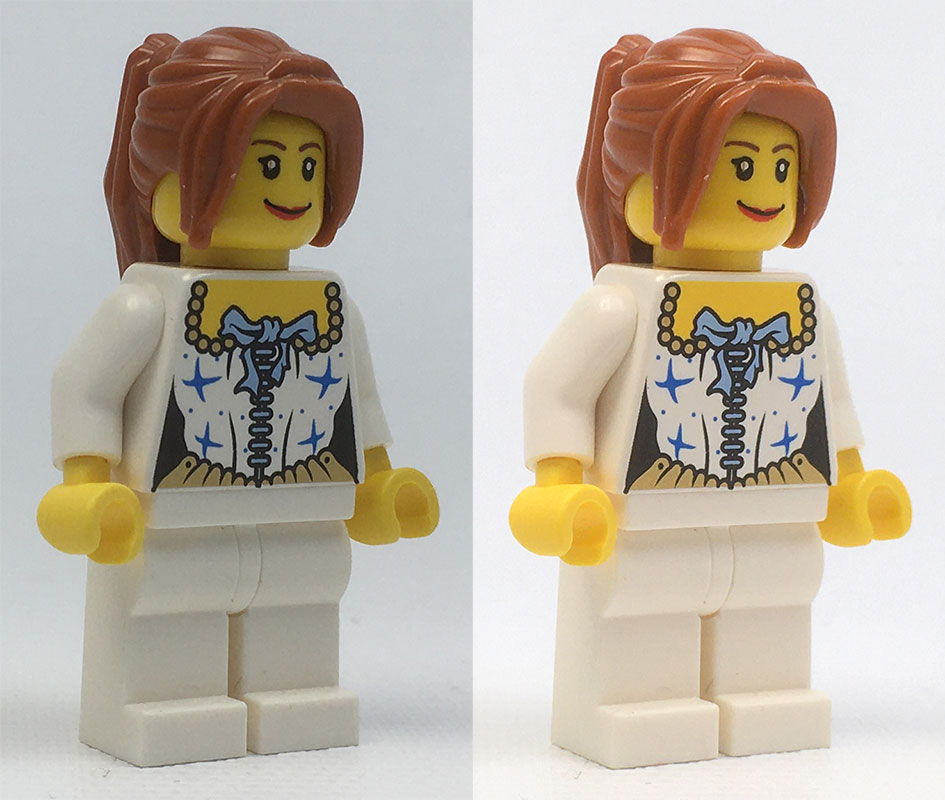
Below image shows the shots from above with a typical tight crop for web usage. Even though the object takes up only about 1/3 the height of the original picture area, it has plenty of resolution to show detail fairly clearly. Note the white dust specks on the hair, the scratch on the highlight of the eye, and some blue threads around the feet are clearly evident.
So, why does this trick work? Cameras are pre-set at the factory to expect a certain overall "gray level" in any photograph. This is because most things being photographed...landscapes, family snapshots, and so on...typically occur in an environment that is not overly light (sun on snow) or overly dark (night). When you take a photo that has lots of white, the camera "darkens down" the shot to deliver the preprogrammed "middle gray" level it expects. By covering much of the white with black, we give the camera the gray balance it is expecting through the lens, so the shot is better on balance.
With a dedicated camera chances are you would be able to manually adjust the camera settings...allowing more light in...to compensate by overriding the automatic setting levels. Phone cams don’t often or easily let you get to these settings, so this “analog” solution is quick and doesn’t require messing around with settings or installing additional software. It’s not perfect, but it does yield decidedly better results.